Set up your company profile
Your company profile is what makes every render, brochure, quote and invoice look like it came from your business — not ours. Set it up once and it applies everywhere. You can change it any time from Settings.
Watch the walkthrough — or follow the written steps below.
Open Settings
Click your avatar in the top-right corner and choose “Settings”. First-time users are taken here automatically after signing up.
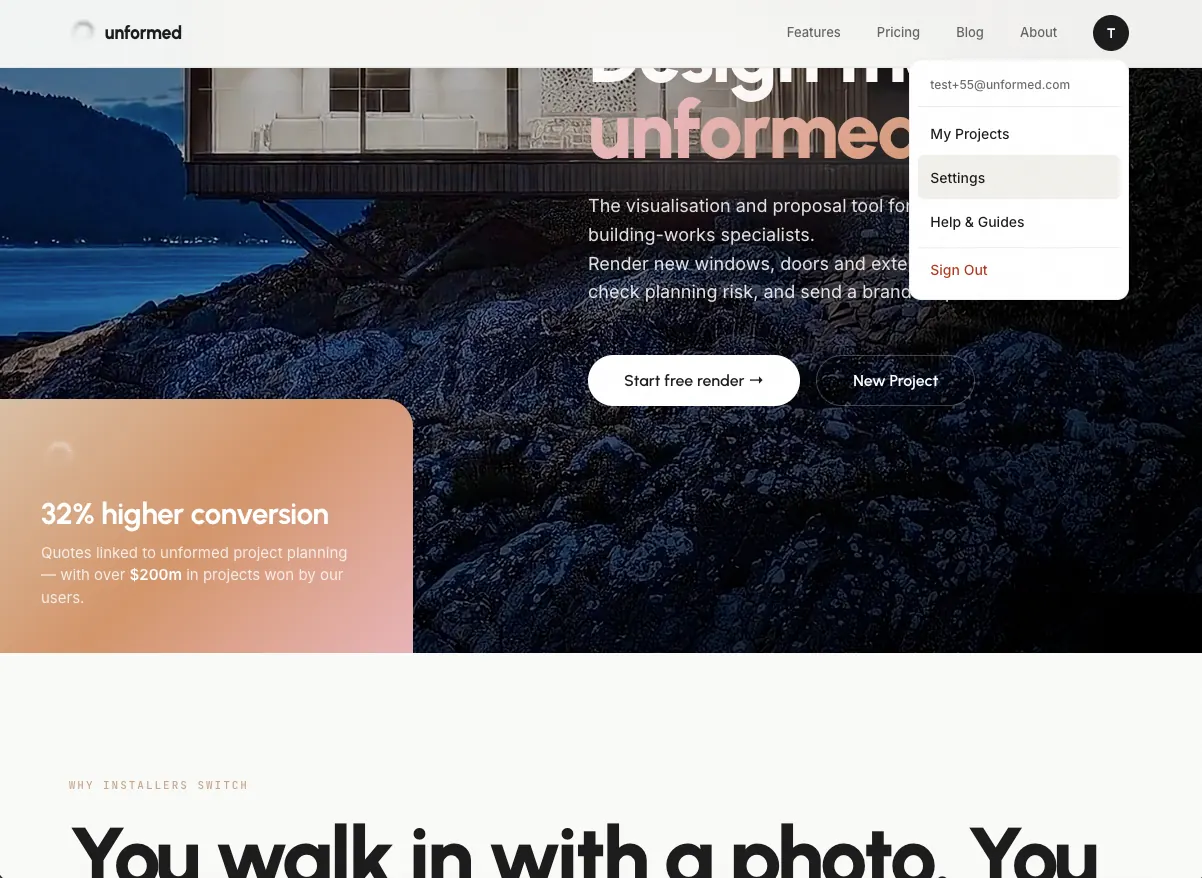
Add your company details
On the Company step, upload your logo and fill in your company name, contact name, email, phone and website. Your logo appears on every client-facing brochure, so use a clear, high-resolution version.
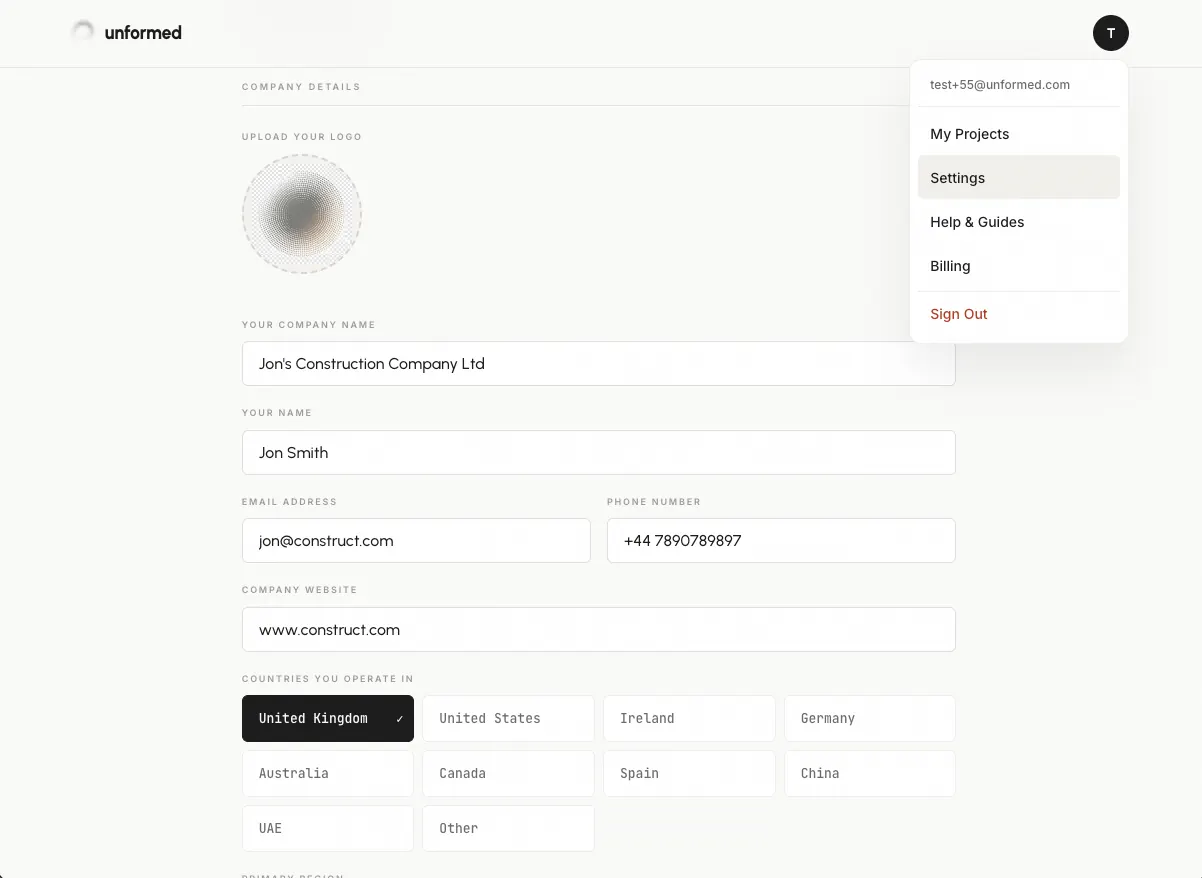
Set your business settings
On the Business step, choose your currency and set whether VAT applies (and the rate). Add an “About us” blurb and your company registration number — these build trust on your proposals.
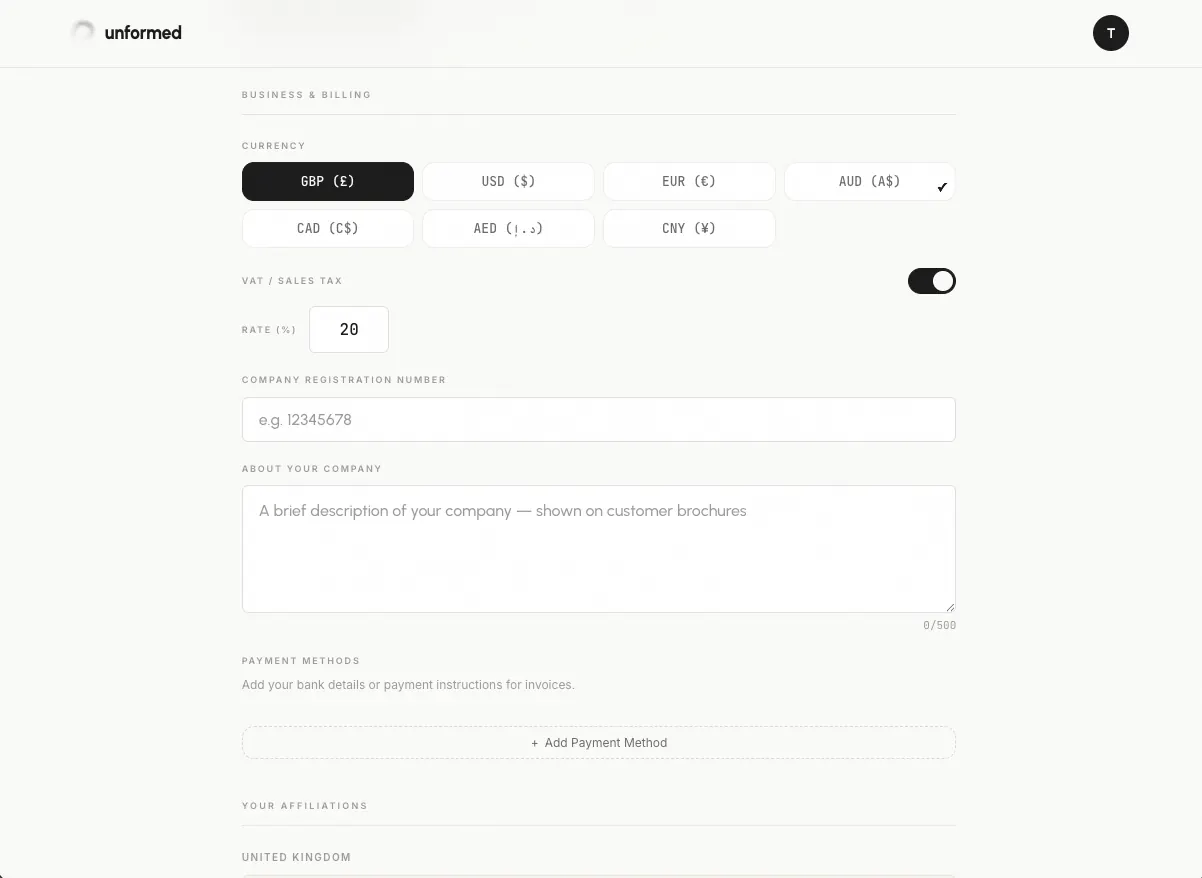
Add your accreditations
On the Affiliations step, add any trade bodies or certifications you hold (e.g. FENSA, CERTASS). These display as trust badges on your brochures.
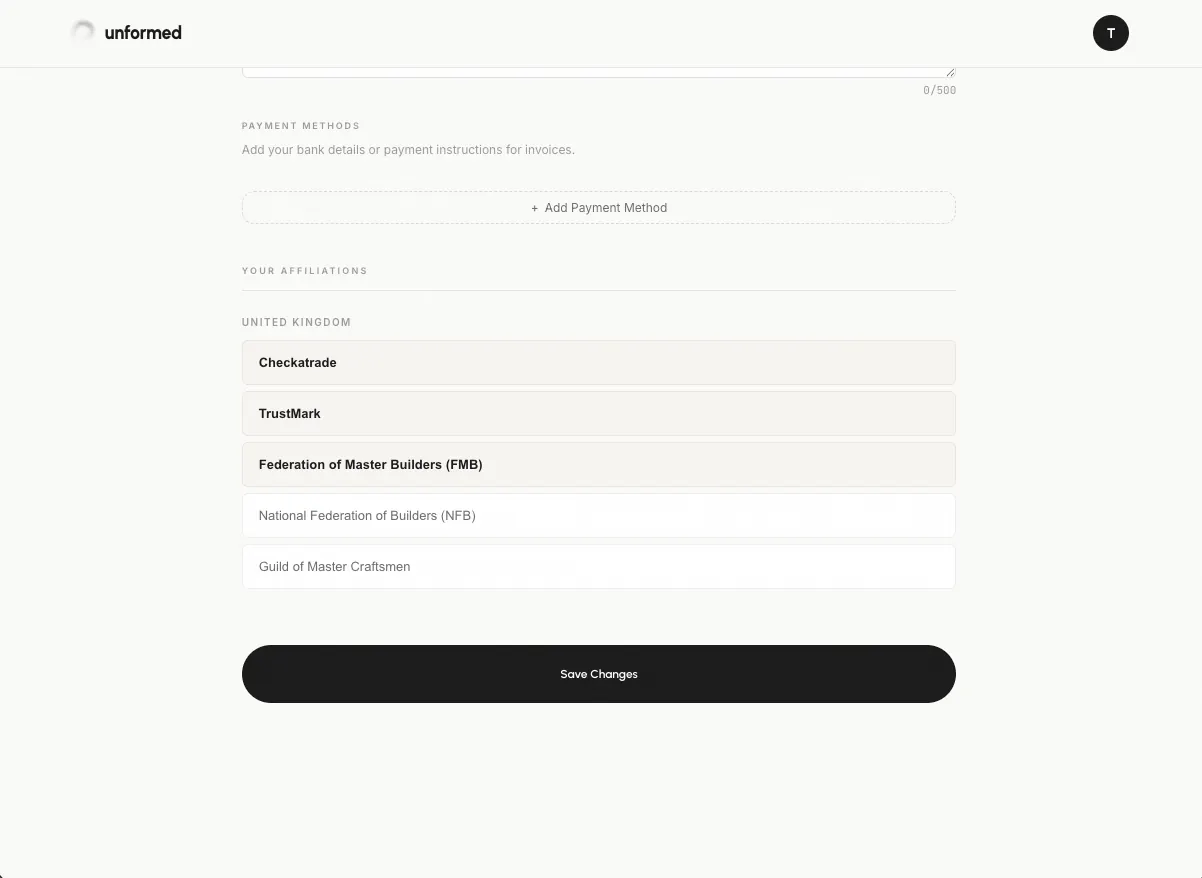
Save
Click Save. That’s it — your branding now flows automatically into every render project, shareable brochure, quote and invoice you create.
Tips
- You can revisit Settings and update any of this at any time.
- A transparent PNG logo looks best on both light and dark brochure headers.